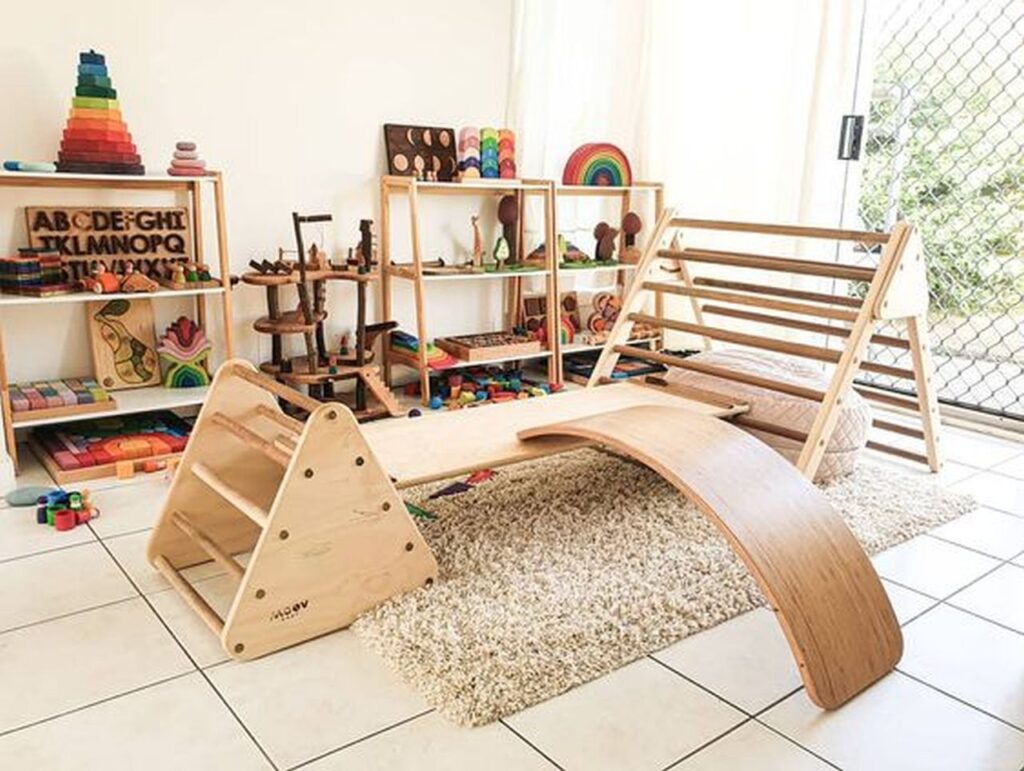
It's easy to mistake the Pikler Triangle for a run-of-the-mill climbing structure due to its unassuming appearance. Allows for the development of gross motor skills in a natural way, as well as the flexibility to explore and discover one's own limits. Children as young as 6 months can pull themselves up on it, toddlers can work their way over the top and slide down, and kids as old as 5 or 6 can use it to climb, construct forts, and play make-believe. Even though I've seen children as early as 12 months old climbing up this Pikler, D didn't reach the summit until he was 21 months old. She had always loved utilising it as a tunnel, a ramp, and a climbing wall up to her limit. At 32 months old, she is constantly testing herself with novel and complex climbing and sliding strategies. Everyone loves it when she invites their pals over to play; she even takes her dolls and stuffed animals down the slide with her. On wet days, we've utilised Sarah's Silks to build forts and include it into our indoor obstacle courses. The list of outcomes is practically limitless.
We have a wide range of baby nursery furniture to help you create the perfect room for your baby.
FAQs About Baby Nursery
Nursery helps children develop social skills and make friends. Socialising with other children is a big part of preparing them for later life. They will be eager to engage with their peers and become aware of the attachment they feel towards children they regularly play with.
The importance of planning in early years is that plans are the key to making learning effective, exciting, and progressive. Its purpose is to ensure that all children enjoy a balanced curriculum.
Interacting with others at nursery gives children the chance to establish boundaries, note how others react to their actions and find ways to resolve conflicts amicably; all valuable skills that they will take into adulthood.
Really try to avoid disposable, single-use items such as plastic cutlery and straws as much as possible. Teaching children that the materials they use aren't just something to throw away will make them more mindful when using things in the future.
They will spend lots of time sharing rhymes, songs, stories, and playing games to develop their speaking and listening skills. They will be encouraged to learn to listen carefully, to develop concentration, to respond to questions and instructions, to share ideas and experiences, and to take part in conversations.
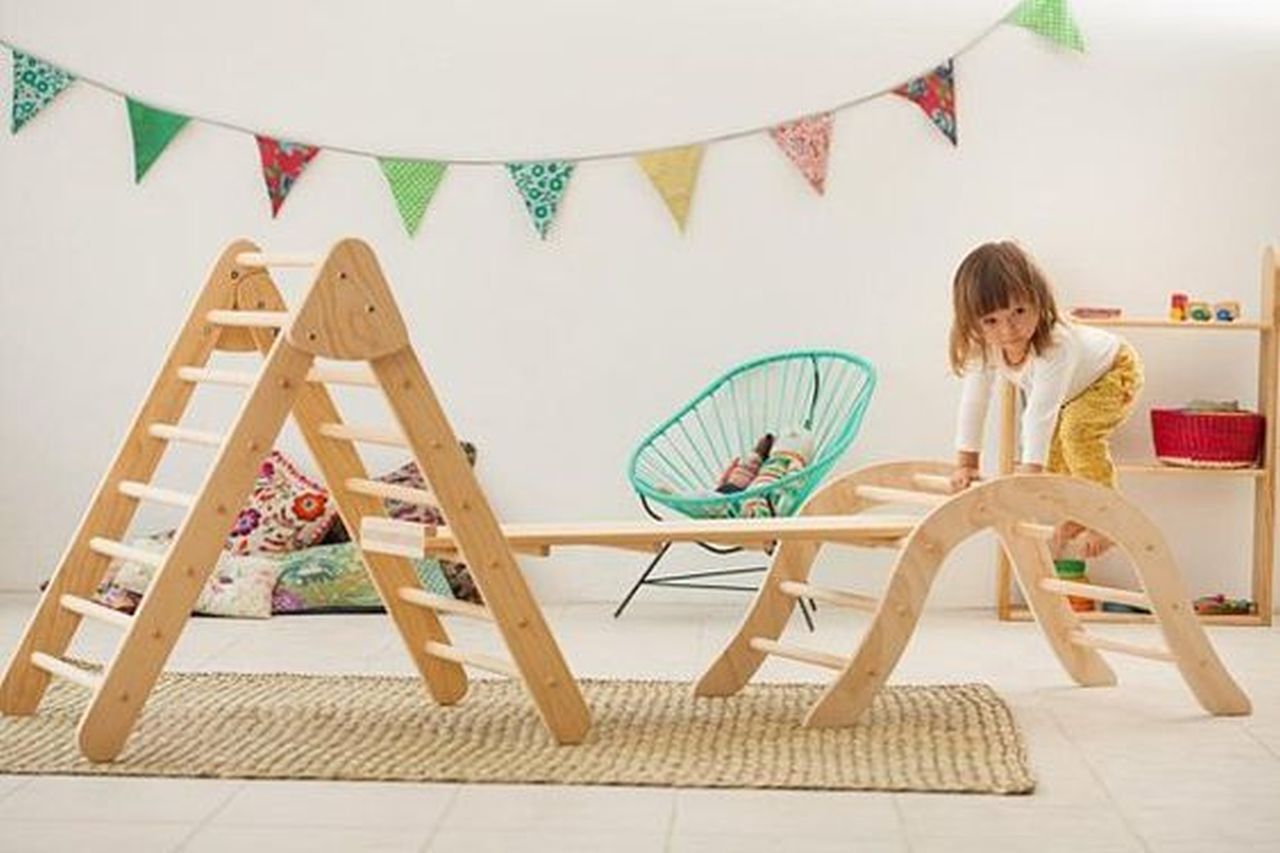
Many forms of the Pikler Triangle
Assembling the Pikler Triangle
Primary Stage: Gathering Supplies
Materials
I ripped 12 feet of 2 by 3s from Douglas Fir with nice, straight grain. Purchase a shorter 12-foot board or have a lumber yard split a longer board in half to fit in your car. It's important to remember that lumber is sold in nominal sizes, so a piece advertised as "2" x 3" will actually be slightly smaller than that in actuality.
A total of 13 dowels, each measuring 3 feet in length and 1 inch in diameter, are included. At the hardware shop, check for curved dowels by rolling each one over a flat surface to see its ends. Be picky about which pieces of scrap wood you purchase from big-box stores and choose just the best ones. You can measure the diameter with a calliper or a tape. A dowel with a 7/8" diameter was rattling about in my 1" hole, so I had to pause the project in the middle to replace it. Grrrrr.
Two feet is the standard length for 1x10 lumber (clear grain Douglas Fir again)
Two screws, each two and a half inches in length with a one-inch head, are provided for making fine adjustments. Sadly, McMaster Carr did not stock a suitable alternative to Production Tool Supply Part Number KHS-1SS. In the absence of proper quick-release pins, I made do using thumbscrews and tee nuts as a locking mechanism. To deconstruct the triangle for storage and reassembly, a number of screws must be used; still, this is the best option I could discover. If you come across a more reliable source, please share the link in the comments so I can update the post. Production Tool Supply has a minimum order of $25, so I bought four thumb screws at $6.70 apiece, more than enough for two Triangles. Someone is always going to want you to make their own version of this if you bring one home. Some of the other hardware is also sold in numbers that make bulk purchases more cost-effective, which is something I'll mention.
McMaster-Carr #8 bolts, 3" in length (or #4 or 26, depending on whether you choose with Option 7A or B), Part Number 90294A209. Probably available locally for less money.
One flat-head socket cap screw, model number 90585A596 from McMaster-Carr, measuring 3 inches in length, and made of stainless steel with a 2 5/16-inch diameter.
There are 20 of the 5/16"-18 Nylon Lock Nuts (McMaster Carr Part Number 97135A220) in a package. The ones I got at the hardware shop are 3/8 inches in height, but McMaster sells ones that are 1/2 inches in height that should work just as well.
Two steel tee nuts, each with a 20-millimeter (1/4 inch) internal thread and a 12-inch barrel length (McMaster Carr Part Number 90598A043) 50 units per case
Construction adhesive for wooden objects
Just a little of paint, in any colour you like (if you want to paint it); I used some leftover flat latex from another project.
When I did this, I chose a semi-gloss polyurethane, but you could just as well use a flat or gloss finish.
Download the two Pivot Piece PDF templates, and print them out. Due of time constraints, I was only able to quickly trace the outline of my wood item for you.
Tools of a Unique Nature
- Forstner bit measuring 1 inch
- An Allen wrench with a 3/16-inch diameter (no, none of those wrenches in that metric set you have will work). Mine came from a neighbourhood hardware store.
- Countersink bit, 5/8 inch
- Something long and straight to use as a ruler or to draw a line with
- Compass
- Saws, either circular, band, or jig
- Drill presses are helpful, but not necessary, as long as you take your time and are cautious.
- It's much easier with a belt sander, but you could get away with not using one if you put in the time and effort.
Cutting
Saw the wood into four pieces, two of which should be 36 inches long and the other two 32 inches. I acquired my three-footers by chopping my six-footers in half (it doesn't matter if the pieces aren't an exact match in length by an eighth of an inch or so).
That which is purchased from a store Dowels used to construct triangles are typically 30 "my hair is long because that's how I cut it. For a broader triangle, simply keep the base and height at 36 ". Dowels are typically made from low-quality wood that may be marred by knots or other imperfections (or those darned stickers with the bar code that are really hard to dislodge). If you can, remove the imperfections by cutting them off.
Rounded Ends
In reality, the width of a piece of lumber that is nominally 3 inches broad is closer to 2 and a half inches. Mark the centre of the board with a small pencil dot. Half the distance you measured should be the distance you set your compass to, and it should be centred between two sides and one end of the board. If the compass is off, make sure it is correct in all three directions before setting out. Make a half circle that touches the board's edges and bottom. To finish, flip the board over and do the same thing on the opposite end.
Cut along the semicircles you sketched on all four pieces of lumber with a saw of your choosing (a band saw or jigsaw would do just fine). Even while precision isn't absolutely necessary, cutting a straight line with the band saw will save you a lot of time if you don't have access to a belt sander.
Ready your belt sander; I like to invert mine and clamp it to a sawhorse. For additional control over the shaping process, I switch to a belt with an 80-grit and keep the sander running at Speed 4 (out of 5). The sander may remove a lot of material quickly when set to this speed, and occasionally you lose more than you intended. After giving the curve a light sanding, double-check that the two halves are uniform and that the front-to-back curve is about flat. Repeat the sanding and inspecting steps until you reach a satisfactory finish.
Sanding Some More
After you have finished shaping the ends, you can go on to the flat surfaces of the timber to remove any nicks or markings with a 120 or 150 grit belt. Always keep the full width of the lumber on the belt to prevent the belt from digging a rut into the wood that will be difficult to remove.
Get the 1x10 board while you still have the sander out of its sawhorse. Lightly sand away any imperfections, taking care to run the sander in a W-shaped motion, primarily along the length but also across it, to avoid gouging a groove in the wood with the belt.
A piece of sandpaper held in the palm of your hand can be used to buff the dowels and remove any additional roughness from where they were cut.
Modifying the Side Rails by Drilling Holes
Examine each plank of wood to determine which edges and faces are the most desirable for further processing (due to their superior shape, grain pattern, colour, etc.). My standard practise is to display the attractive sides and tops.
To achieve this, find the centre of the width of each of your long lumber pieces and lightly (so that it may be sanded off more easily) draw a long line at this point down the length.
Take the long side rails and mark the locations for the dowels with Xs (make the Xs big and heavy enough to see; you'll cut them out in the next step). Given that you probably lost some length while sanding, it is recommended that you position the first X 1" below the end you have chosen to be the top, and then let the remaining X's to fall out at 5-inch intervals. As long as the lowest rung is no more than 5" from the ground, it's fine. Transition to the opposite long rail and repeat.
The first X should be placed on the short rail at the same height from the floor as the bottom rung on the long rails, and further Xs should be spaced every 5" along the short rail. You don't want your top X to be any lower than 2" from the top of the board so that you have enough headspace to screw in the bolt. It should be done again with the second short rail.
Prepare the drill press's depth stop so the Forstner bit will go about halfway through the board's thickness. Instead of using a drill press, you might stop the drill frequently to check if the tape on the bit is flush with the top of the board if you don't have one.
Carefully drill a hole into each X until you reach the depth stop, making sure to centre the bit precisely on the X as it spins (I discovered that I could look "through" the bit as it rotated to confirm that the tip was touching the X). Iterate until all four rails feature an X. Make sure the first and last holes are the same depth by checking them (she says from bitter experience).
The lines you made in the middle of the boards need to be sanded out (you should be relieved you were only being careful).
If you don't want the paint job to be ruined by sawdust, make sure to wipe down your pieces with a damp rag and then vacuum.
Paint (optionally).
Take into consideration the concept of "pops" of colour and the idea that odd numbers are interesting. Therefore, I had to utilise paints I already had on hand to colour an odd number of rungs; he would have prefered that I acquire three special colours only for this.
Even if you're using a lot of dowels, you should still be able to balance them across the sawhorses without touching the floor. A thick layer of paint will prevent the ends from fitting into the slots, so be careful! My prototype omitted this step because I thought I could avoid it by edging carefully around the side rails, which was a terrible idea. After the tips have dried, you can switch to painting the middles (to within approximately 1/2" of the tips) with two coats while the ends dry.
You can skip this step if you plan on painting the entire ladder before applying polyurethane.
Setup of the Ladders
Check that your dowels will fit into the holes by doing a dry fit. A few of my dowels required sanding to fit, and one of them was exactly 1/8 in "too skinny; had to be swapped out for a wider one to prevent rattling. The dowels should slide in and out freely without any resistance, but a snug fit is OK as long as the dowel reaches the bottom of the hole during the dry fitting; the glue will smooth off any rough edges.
Here, you'll want to choose between two possibilities.
Alternate A:
It took some trial and error, but I finally settled on a system for screwing the dowels into the side rails of my prototype that I thought was really neat. In retrospect, I believe that is unnecessary, as most modern Triangles I've seen have been assembled using simply glue, thus I've adopted this way as the official one. Of course, my screw approach is the way to go if you need the further security (maybe because you have particularly heavy children). Take a 1/8 "use a standard Take advantage of the divot left by the Forstner bit and drill straight through the middle of the holes you drilled for each dowel. Don't try to fit dowels into some of the holes and then drill the remainder at a later time; drill all the holes at once. Finally, insert a dowel into each hole and turn the unit on its side so that the side rail is facing up and the unit is resting on the dowels on the floor. This is where things get interesting: the hole you just drilled doubles as a doweling jig, allowing you to drill a pilot hole directly into the dowel without any additional tools or supports. I drilled twenty-six of them and not a single dowel popped out of the drill bit. Cool, huh? Start by drilling pilot holes, then secure the ladders using screws in all but the top two holes on each side rail of the long ladder.
Alternate B:
A pilot hole should be drilled through the divot created by the Forstner bit in the two holes located at the top of each of your long side rails, as outlined in Option A. (so, four holes total). The long ladders will be fastened to the Pivot Pieces via these openings.
Fill each hole in one long side rail with a dab of wood glue. If any of your dowels are a tight fit, you can ease their insertion by spreading glue up the hole's sides with your finger. Dowels should be seated in the holes by tapping them in with a rubber mallet. Apply glue to each hole in the opposite side rail of the same length as rapidly as possible. Check that the tops of both side rails are pointing in the same direction. When you get the dowels in the exact position, place the second rail over them and tap on it with a rubber mallet to seat the dowels.
Finish the short ladder in the same way regardless of the method you chose, with the exception of screwing into all holes. Count how many "tops" there are, and make a mark for the bolt midway between the top of the top dowel and the top of each of the short side rails.
We have a wide range of baby nursery furniture to help you create the perfect room for your baby.
Dissecting the Turning Points
Using a ruler, make sure each of the check lines on the Pivot Piece template is 1 inch in length before you cut it out and put it together. Sorry this needs putting together the template components, but I didn't want to presume you had access to anything fancier than a cheap household printer.
If one side or edge of the 1x10 board is more attractive than the other, you should face that side or edge. Only make sure the bottom of the template is flush with the bottom of the board, and then either draw around it or use a mild tack spray to hold it in place (just spray the template, not the wood, and wait for it to dry before positioning so you don't get paper welded to your board). First, insert a screw or drill bit through the template and mark the holes labelled A and B (just in case the template comes loose), and then cut off the shape with a band saw.
Align the Pivot Piece with one of the long side rails to ensure a snug fit (the end with the holes in). Does the Pivot Piece's shape mimic that of the side rail? Do the dowels appear to be in the exact middle of the hole markers? Modify as necessary (but make sure it is needed before you trim). Sand your cut and knock the corners off the edges using some sandpaper cupped in your hand once you've determined that this strategy has a chance of success. Drill 1/8" pilot holes through the Pivot Piece at the designated locations, and use a countersink bit to create a shallow depression in which to secure the screw heads.
Drill with the 1/8" bit into each of the four holes in the long side rails to drill a pilot hole as far into the dowels as you can.
Do the same with the second Pivot Piece, but this time only drill holes B and C.
Polyurethane
The two ladders and the Pivot Piece should each have three coats of polyurethane applied to them. Since there are so many crannies to explore, this can take some time. Brush off any excess paint that may have accumulated after you've finished applying a coat. I suppose you could suspend each ladder from the ceiling and do a complete coat at once; if you lay it down, you normally have to flip it back and forth from one side to the other to complete half a coat at a time.
Final Stage of Construction
Through the two holes, fasten the Pivot Piece to one of the long side rails. I position the screws such that the heads protrude just below the pivot piece; this allows me to easily identify the corresponding holes in the side rail. After the screws have been installed, it should feel quite sturdy. Follow the same procedure with the Pivot Piece located on the opposite end of the extended ladder.
Location of Bolts
The long ladder should be placed so that one Pivot Piece is touching the ground and the other is perpendicular to it. Put one under the Pivot Piece and two under the side rail of the ladder using the spacers (the scrap wood from cutting out the Pivot Pieces).
Adjust the short ladder by sliding it between the two Pivot Pieces until its side rail is parallel to the Pivot Piece's side and the top rails of both ladders are five inches apart at their centres (i.e. from dowel centre to dowel centre, not dowel edge to dowel edge). Drill a hole for the bolt with a 21/64 bit through the side rail of the ladder and the pivot piece at the designated location. Care should be taken near the conclusion to prevent the Pivot Piece from cracking from the impact of the drill. (Cease when you encounter air, then concrete.)
Invert the part and countersink the hole only on the side with the pivot (no need to countersink the side rail). Place a bolt in the opening and secure it with a nut. The locking nut should stop about 1/16" from the side rail to provide a secure hold without limiting movement. Place the second side of the compact ladder in the same position as the first, then drill a new hole and screw in a new bolt.
Threading a Screw
Drill a hole with a 9/32 bit through the side rail and Pivot Piece after placing the triangle back on the ground in its 'braced' position. Placement is not particularly important as long as the Pivot Piece is traversed, however I did so halfway between the top two rails. Repetition: be careful not to fracture the Pivot Piece by forcing the bit in too much. If you get splinters like I did, you'll have to use a chisel to remove them because you didn't countersink the hole. To make room for the tee nut, drill a larger hole in the side rail (with an 11/32 bit) to a depth of about 3/4". It's not really important to get the depth quite right, as long as it's between the tee nut's depth and the side rail's breadth. Change the orientation of the device and repeat the process on the opposite side.
Put a tee nut in each hole in the rails, and if necessary, tap them into place with a hammer. It is necessary to insert the thumbscrew into the Pivot Piece from the outside. It requires a good deal of screwing to seat it, but it works well once in place.
DIY FOLDABLE PIKLER TRIANGLE – WITH PRINTABLE PDF PLANS!
SUPPLIES
- One Sheet of 3/4" x 2' x 4" Plywood
- Eleven wooden dowels, each measuring 4 feet in length and 1 inch in diameter
- One Sheet of Plywood Measuring Two Feet by Four Feet and Half an Inch
- a pair of 6' x 4' x 3/4" poplar boards
- Any outdoor stain or sealant will do as long as it stays outside.
TOOLS
- To construct this pikler triangle, you need only a few simple items. What you'll need is:
- Jigsaw
- Router for Palm OS
- Crosscut saw
- Sander
- Drill
- Forstner drill bit that is one inch in diameter
Building the Triangle
You simply construct two ladders, one slightly longer than the other, to construct the climbing triangle. We created one that was 36 inches in length with six rungs and another that was 32 inches in length with five rungs. Two pieces of 3/4" poplar and one piece of 1" dowel measuring 30.5" in length were used to construct each of the 31.5" broad ladders.
The rungs on both ladders were positioned at 2 inches apart, 9 inches apart, 16 inches apart, 30 inches apart, and 34 inches apart on the longer ladder. After marking where to drill holes, we rounded off the ends of each board and used a 1′′ Forstner bit to make the holes.
To achieve the desired "hombre" appearance, we stained each rung a different colour. You can choose to leave them untreated, stain them all the same colour, or do a rainbow of combinations.
Every single ladder was built by first glueing and then tapping each rung into a predrilled hole in one board, and finally glueing and tapping the other board into the ends of the rungs.
These bar clamps were 36 inches in length, and we used them to secure the structure. (As a side note, those Bessey clamps are of excellent quality and cost much less on Amazon than they would at a hardware store.)
The tops of the two ladders were then held together by two pieces of 1/2′′ plywood, which we subsequently cut off. We tapped holes into the plywood to secure the ladders.
We used a wing nut and a knob screw to fasten the shorter ladder's lower two rungs together. By disassembling the ladder in this fashion, we may save space when not in use.
Finally, we used a router to round out the plywood's sharp edges, making for a more aesthetically pleasing final product.
Erection of the Climbing Wall
There is a lot less complexity involved in the climbing wall compared to the triangle. First, we took a 24x48 inch sheet of 3/4 inch thick plywood and rounded its corners with a router before sanding it to a mirror finish.
Next, we took a scrap cut off of one of the dowels and two scrap pieces of wood and fastened the boards to the back of the wall about three inches below, using the dowel as a spacer between the boards. Here is where the climbing wall will hook onto the triangle's levels.
Then, we took half-inch plywood and shaped it with a jigsaw into grab bars. Two screw holes were countersunk and the whole thing was polished down to a mirror finish.
We dyed the handholds with the same colours we stained the triangle ladder, then glued them to the board to construct the climbing wall
DIY Pikler Triangle - Construct Your Own
What you'll need in the way of supplies is:
- Adjustable Miter Saw
- Suitably sized tape measure
- Mechanical Drilling Device
- Punch in the Middle
- Bit for Forstner Drills, 1 1/4"
- Drill Bit, 5/8 Inch
- Half-Inch Shank Drill
- Crosscut Saw
- Pattern for a 5.5-inch-wide Circle (round tupperware)
- Sandpaper in 120 and 220 grit for a random-orbit sander
- Router
- A Bit That Is Half an Inch Round
- Crimping Bars
- Drilling by Hand
Use of a cut-off wheel on an angle grinder
The following are the patterns that will be used: Connecting Bracket for the Pikler Triangle and the Pikler Triangle Itself
This is the stuff you'll need:
- 2 pieces of 5/4" x 6' x 10' select pine board
- 1 1/4″ Wooden Dowels, Eleven Pack
- ACX Handi-Panel (Plywood) 3/4" x 4" x 4" - 1 Sheet
- Tape for painters; blue
- An Adhesive for Wood
- Wood-Staining Stain, 1 Quart (and staining supplies)
- Paint by the Quart (and painting supplies)
- Epoxy with a "2"
- Blue Lock-tite, if you will
- Ball-Grip Quick-Release Pins, Qty 2, 1/2 in. Dia. x 3 1/4 in. Usable
- Bearing, Sleeve, Multipurpose, 1/2 Inch Shaft Diameter, 5/8 Inch OD, 1 Inch Length - 14 Pack
- Bearing Sleeve, Multipurpose, 1/2 in. Dia. Shaft, 5/8 in. OD, 1 in. Length - 6 Pcs
- 6 Pack of Nyt Open-End Caps, 3/8"-16 Thread Size
- A Variety of Washers in the Standard 1/2-Inch Size
- 6 Shoulder Screws, 1/2 in. Dia., 1 3/4 in. L., 3/8 in. Thread
The First Procedure:
Using the two 10-foot planks, cut four legs. Each of the two planks is 48 inches in length. The combined length of these two planks is a whole foot and a quarter.
Phase Two:
Make a hole in each of the legs. Take measurements from the far end of the legs, using the assembly pdf's leg design dimensions as a guide, and mark the hole positions with a centre punch. Put blue painter's tape over the holes to keep the wood from splitting. Drill perpendicular holes in boards using a variety of sized drill bits (1 1/4" Forstner Drill Bit, blue; 5/8" Drill Bit, yellow; 1/2" Drill Bit, red); leg drawing dimensions serve as guides for hole placement.
Phase Three:
Go around the outside of the legs. Follow the pattern of the circles down both of your legs. The jigsaw was used to cut rounded corners. Use an orbital sander and 120- and 220-grit sandpaper to refine the contours of a surface.
Phase Four:
Using a router, round off the legs' edges. A perfect radius can be achieved by adjusting the router bit's depth on a scrap of wood. Counterclockwise routeing of all leg edges (not climbing).
Phase Five:
Remove excess length from the eleven circular dowels. Mark off 40 inches on the round dowels and cut them to size. The swinging side can move freely between the brackets if you trim five of the circular dowels so that they are just a hair longer than the others (about 1/16′′). The risk of splintering can be reduced by taping off the area to be cut with painter's tape. Use a mitre saw to cut the round dowels to the appropriate length. Make sure the dowels are cut squarely and smoothly on both sides. And remember that the slower you go when using a mitre saw, the smoother the end result.
Phase Six
Stick the knees and ankles together using glue. Ensure there is enough space between the dowel and the hole before continuing (my dowels required some hand sanding to fit). Glue the finished ends of the circular dowels together. To be inserted into the leg openings. While drying, clamp the legs together to ensure they dry straight and parallel. After inserting the dowels (around 37 5/8 inches for the fixed leg and 37 9/16 inches for the swinging leg), you should use some scrap 2x4s to clamp the legs together. For the top bracket to be screwed on in the correct spot, it is essential that the legs remain parallel on their sides.
Phase Seven:
First, you'll need to make the top brackets by tracing the bracket pattern onto a piece of plywood (twice). Before cutting, cover the area on both sides with painter's tape to prevent splinters. Remove the brackets with a jigsaw.
Phase Eight:
Use the template and centre punch to designate where to drill holes in the brackets. Blue painters' tape can be used over the holes to prevent splintering (especially the backside). Follow the specifications on the drawing to drill holes (5/8′′ Drill Bit, yellow, and 1/2′′ Drill Bit, red).
Phase Nine:
Stain and sand the legs. When staining or painting brackets, it is essential to sand off any extra adhesive first. We used an espresso stain on the legs and dowels and a white paint on the brackets. Staining might be an option, although stain wouldn't be as effective on plywood as paint would be. For a glimpse of the unfinished design, see the image below. That style appeals to me, too. To proceed in that manner, you can disregard the next instruction.
Phase Ten:
Get out the cut-off wheel for your angle grinder and trim some brass bushings down to board size. Both the bracket and leg bushings will be about 3 inches in length, with the leg bushings measuring about 1 14 inches. I purposely left them a little long and rounded off the ends with the sander after they were put in. Before installing the bushings into the legs and brackets, mix some 2-part epoxy and coat the exterior of each one. To help the epoxy grip the bushings, I filed ridges into the outsides. When the epoxy has set, you can remove any excess debris from the bushings by drilling them out with a 1/2-inch bit and a hand drill. Drilling was required to insert the pins and align the leg holes with the bracket holes.
Attach the brackets to the long leg for good by using the 1/2-inch bolt holes (red). The threads shouldn't come undone because I used lock-tight on them. Using the corner bushings, loosely attach the short leg to the bracket. This is the deciding factor. In order to prevent the nuts from loosening on these two bolts, I would additionally apply lock-tite.
You may adjust the height or fold it away into a compact shape by inserting the Quick-Release Pins into the brackets and the pivoting leg.
Finally, the end!
It is suggested that a rug or mat be used to support the Pikler triangle. If Walter cannot place the triangle on a mat or rug, he will shake it. Since it weighs little, Walter is able to push it, too. You can prevent falls with the use of a mat or rug, too.
With any luck, you'll be able to use this information while you work on your next project.
Check out our range of baby nursery products and furniture for all your baby needs.
Conclusion
Pikler Triangle allows for the development of gross motor skills in a natural way. Allows for the flexibility to explore and discover one's own limits. Children as young as 6 months can pull themselves up on it, toddlers can work their way over the top and slide down. In absence of proper quick-release pins, I made do using thumbscrews and tee nuts as a locking mechanism. McMaster Carr did not stock a suitable alternative to Production Tool Supply's KHS-1SS. Some of the other hardware is also sold in numbers that make bulk purchases more cost-effective.
The width of a piece of lumber that is nominally 3 inches broad is closer to 2 and a half inches. Dowels used to construct triangles are typically 30 "my hair is long because that's how I cut it". Get the 1x10 board out of its sawhitewash and sand it with a 120 or 150 grit belt sander. Lightly sand away any imperfections, taking care to run the sander in a W-shaped motion along the length of the board. Take the long side rails and mark the locations for the dowels with Xs (make the Xs big and heavy enough to see; you'll cut them out in the next step).
Drill a hole into each X until you reach the Forstner bit's depth stop. Paint the ladder tips and middles with two coats of polyurethane while the ends dry. A thick layer of paint will prevent the ends from fitting into the slots, so be careful! Check that your dowels will fit into the holes by doing a dry fit. Most modern Triangles have been assembled using simply glue, so I've adopted this method as the official one.
Drill pilot holes, then secure the ladders using screws in all but the top two holes. Dowels should be seated in the holes by tapping them in with a rubber mallet. Count how many "tops" there are, and make a mark for the bolt midway between top of the top dowel and the top of each of the short side rails. The ladder and Pivot piece should each have three coats of polyurethane applied to them. Drill 1/8 pilot holes through the Pivot Piece at designated locations, and use a countersink bit to create a shallow depression in which to secure the screw heads.
Adjust the ladder by sliding it between the two Pivot Pieces until its side rail is parallel to the Pivot Piece's side and the top rails are five inches apart at their centres. Drill a hole for the bolt with a 21/64 bit through the side rail of the ladder and the pivot piece. You simply construct two ladders, one slightly longer than the other, to construct the climbing triangle. To achieve the desired "hombre" appearance, we stained each rung a different colour. The tops of the ladders were then held together by two pieces of 1/2′′ plywood.
DIY Pikler Triangle - Construct Your Own. There is a lot less complexity involved in the climbing wall compared to the triangle. We took a 24x48 inch sheet of 3/4 inch thick plywood and rounded its corners with a router before sanding it to a mirror finish. Mark off 40 inches on the round dowels and cut them to size using a mitre saw. Drill perpendicular holes in boards using a variety of sized drill bits.
We used espresso stain on the legs and dowels and white paint on the brackets. Staining might be an option, although stain wouldn't be as effective on plywood as paint would be. It is suggested that a rug or mat be used to support the Pikler triangle. Since it weighs little, Walter is able to push it, too. In order to prevent the nuts from loosening on these two bolts, I would additionally apply lock-tite.
Content Summary
- Children as young as 6 months can pull themselves up on it, toddlers can work their way over the top and slide down, and kids as old as 5 or 6 can use it to climb, construct forts, and play make-believe.
- In the absence of proper quick-release pins, I made do using thumbscrews and tee nuts as a locking mechanism.
- To deconstruct the triangle for storage and reassembly, a number of screws must be used; still, this is the best option I could discover.
- CuttingSaw the wood into four pieces, two of which should be 36 inches long and the other two 32 inches.
- Mark the centre of the board with a small pencil dot.
- Cut along the semicircles you sketched on all four pieces of lumber with a saw of your choosing (a band saw or jigsaw would do just fine).
- Ready your belt sander; I like to invert mine and clamp it to a sawhorse.
- Sanding Some MoreAfter you have finished shaping the ends, you can go on to the flat surfaces of the timber to remove any nicks or markings with a 120 or 150 grit belt.
- Get the 1x10 board while you still have the sander out of its sawhorse.
- Take the long side rails and mark the locations for the dowels with Xs (make the Xs big and heavy enough to see; you'll cut them out in the next step).
- You don't want your top X to be any lower than 2" from the top of the board so that you have enough headspace to screw in the bolt.
- Prepare the drill press's depth stop so the Forstner bit will go about halfway through the board's thickness.
- Even if you're using a lot of dowels, you should still be able to balance them across the sawhorses without touching the floor.
- After the tips have dried, you can switch to painting the middles (to within approximately 1/2" of the tips) with two coats while the ends dry.
- Setup of the LaddersCheck that your dowels will fit into the holes by doing a dry fit.
- It took some trial and error, but I finally settled on a system for screwing the dowels into the side rails of my prototype that I thought was really neat.
- This is where things get interesting: the hole you just drilled doubles as a doweling jig, allowing you to drill a pilot hole directly into the dowel without any additional tools or supports.
- Start by drilling pilot holes, then secure the ladders using screws in all but the top two holes on each side rail of the long ladder.
- The long ladders will be fastened to the Pivot Pieces via these openings.
- Fill each hole in one long side rail with a dab of wood glue.
- Finish the short ladder in the same way regardless of the method you chose, with the exception of screwing into all holes.
- Count how many "tops" there are, and make a mark for the bolt midway between the top of the top dowel and the top of each of the short side rails.
- Dissecting the Turning PointsUsing a ruler, make sure each of the check lines on the Pivot Piece template is 1 inch in length before you cut it out and put it together.
- Align the Pivot Piece with one of the long side rails to ensure a snug fit (the end with the holes in).
- Drill with the 1/8" bit into each of the four holes in the long side rails to drill a pilot hole as far into the dowels as you can.
- Follow the same procedure with the Pivot Piece located on the opposite end of the extended ladder.
- Drill a hole for the bolt with a 21/64 bit through the side rail of the ladder and the pivot piece at the designated location.
- To make room for the tee nut, drill a larger hole in the side rail (with an 11/32 bit) to a depth of about 3/4".
- TOOLS To construct this pikler triangle, you need only a few simple items.
- What you'll need is: Jigsaw Router for Palm OS Crosscut saw Sander Drill Forstner drill bit that is one inch in diameter Building the TriangleYou simply construct two ladders, one slightly longer than the other, to construct the climbing triangle.
- There is a lot less complexity involved in the climbing wall compared to the triangle.
- Here is where the climbing wall will hook onto the triangle's levels.
- We dyed the handholds with the same colours we stained the triangle ladder, then glued them to the board to construct the climbing wallDIY Pikler Triangle - Construct Your Own What you'll need in the way of supplies is: Adjustable Miter Saw Suitably sized tape measure Mechanical Drilling Device Punch in the Middle Bit for Forstner Drills, 1 1/4" Drill Bit, 5/8 Inch Half-Inch Shank Drill Crosscut Saw Pattern for a 5.5-inch-wide Circle (round tupperware) Sandpaper in 120 and 220 grit for a random-orbit sander Router A Bit That Is Half an Inch Round Crimping Bars Drilling by Hand Use of a cut-off wheel on an angle grinderThe following are the patterns that will be used: Connecting Bracket for the Pikler Triangle and the Pikler Triangle ItselfThis is the stuff you'll need:2 pieces of 5/4" x 6' x 10' select pine board 1 1/4″ Wooden Dowels, Eleven Pack ACX Handi-Panel (Plywood) 3/4" x 4" x 4" - 1 Sheet Tape for painters; blue An Adhesive for Wood Wood-Staining Stain, 1 Quart (and staining supplies) Paint by the Quart (and painting supplies) Epoxy with a "2" Blue Lock-tite, if you will Ball-Grip Quick-Release Pins, Qty 2, 1/2 in.
- Make a hole in each of the legs.
- First, you'll need to make the top brackets by tracing the bracket pattern onto a piece of plywood (twice).
- Remove the brackets with a jigsaw.
- Phase Eight:Use the template and centre punch to designate where to drill holes in the brackets.
- Both the bracket and leg bushings will be about 3 inches in length, with the leg bushings measuring about 1 14 inches.
- Before installing the bushings into the legs and brackets, mix some 2-part epoxy and coat the exterior of each one.
- Attach the brackets to the long leg for good by using the 1/2-inch bolt holes (red).
- Using the corner bushings, loosely attach the short leg to the bracket.
- Finally, the end!It is suggested that a rug or mat be used to support the Pikler triangle.