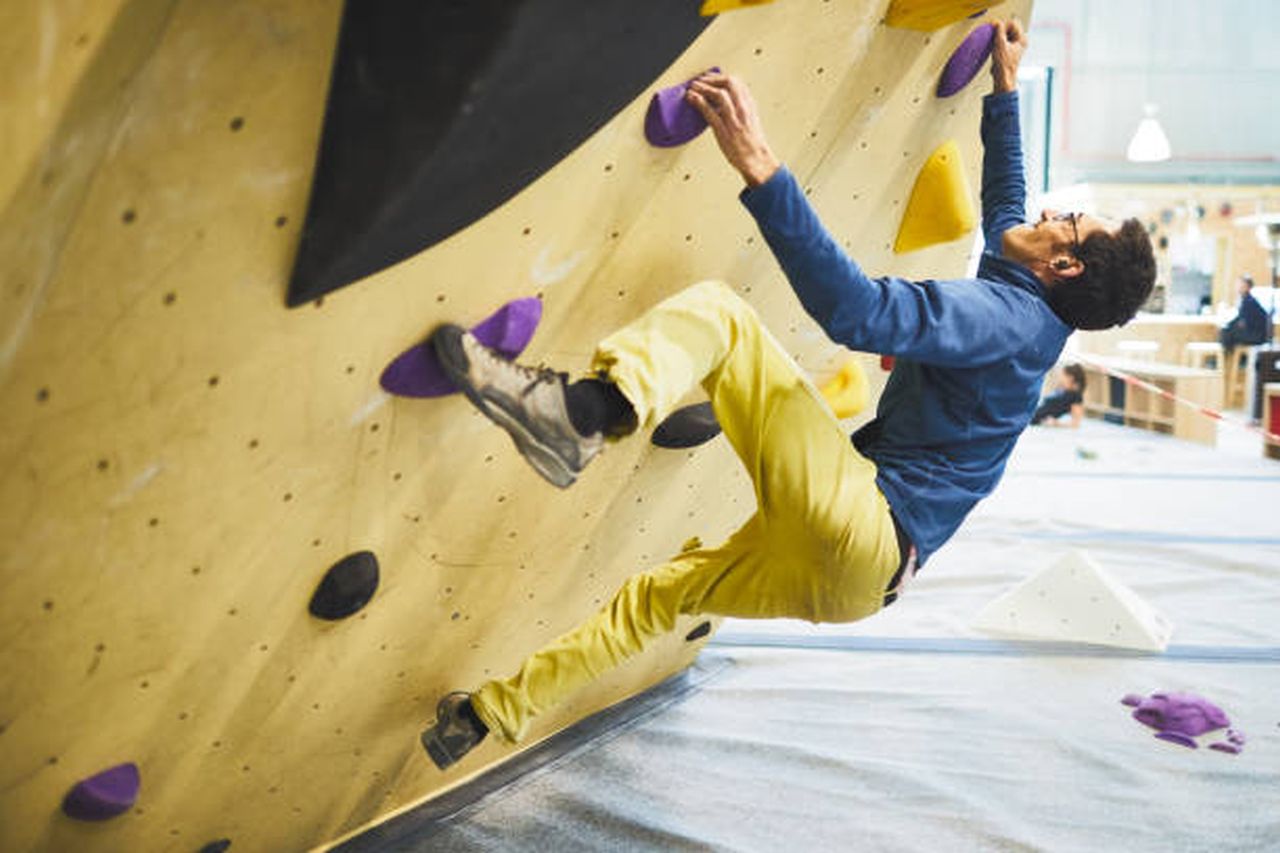
Though you can pay to use the walls at many modern gyms, it may be more practical and economical to instal your own climbing wall at home or in your backyard. You can simply get a fantastic workout in the comfort of your own home by coming up with a good plan and building the wall.
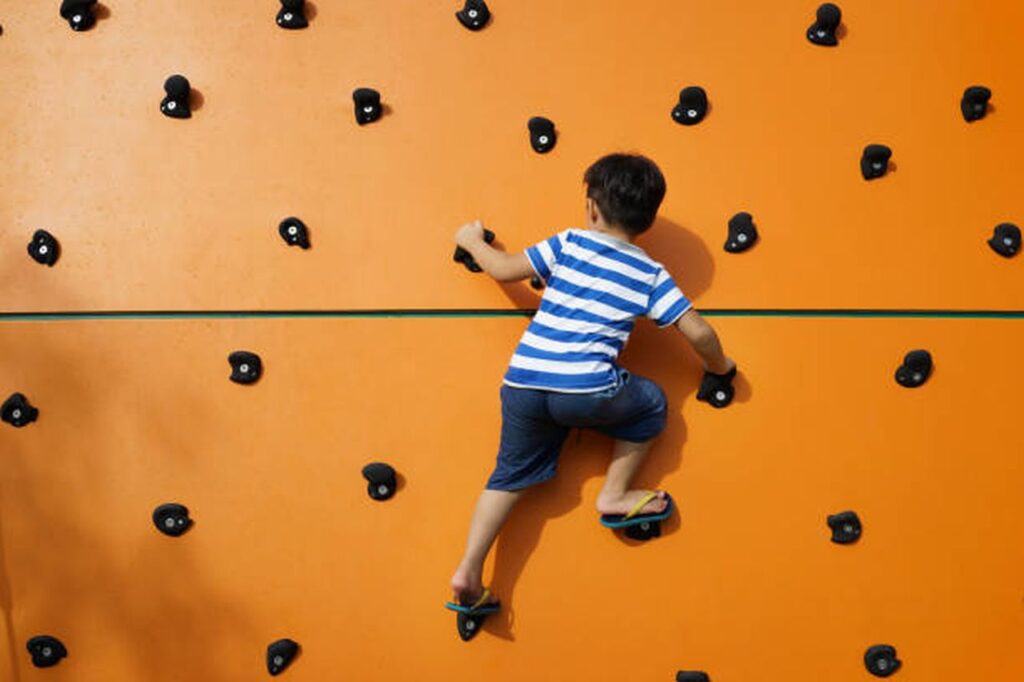
If you have children at home, you probably paused in June's issue to gawk at one extraordinary playroom. The children of a San Francisco home built by Regan Baker have complete reign over the basement, which has a craft room, comfortable, kid-sized sofas, and, most impressively, a rope and rock-climbing wall. You may be wondering how one goes about putting in such a fantastic home entertainment system. Brita Bookser and Adam Griggs can help you out with it. Crawl/Stand/Walk is a design studio founded by two climbers who saw a need for innovative climbing structures for people of all ages.
FAQs About Baby Nursery
Having a place where they are physically, socially, and emotionally secure is imperative for healthy development and a successful future. Children who feel a connection with their caretakers and their home go on to exhibit fewer at-risk behaviors later in childhood.
And if you're stressing about the cost of a nursery, or wondering if you have the space to create one for your child, remember that a nursery is truly optional. Your baby will be just fine without one. Don't let advertisers dictate what's needed for a happy, healthy home and childhood.
The nursery has a responsibility to provide a safe environment for your child and the Manager is responsible for health and safety matters concerning the nursery premises.
Every child has the right to breathe clean air, consume safe food, have access to safe drinking water, and be protected from exposure to toxic chemicals, pollutants, radiation and other hazards in their indoor and outdoor environments.
Germs picked up by young children in the day nursery could quickly lead to infection and illness, so it's essential that the environment is kept clean and germ-free.
Constructing a Climbing Wall in a Variety of Ways
In-Home Rock Climbing Facility with a Freestanding Wall
Materials
I used these supplies. Even though I'm not an expert on structural integrity, I have full faith that they can survive whatever my roommates and I can throw at them. In my case, I didn't follow the initial plan I saw exactly, and you probably shouldn't either unless you're recreating that specific wall.
It's crucial that you choose the best breastfeeding chair for your baby's room. Visit My Baby Nursery to browse our selection of high-quality breastfeeding chairs.
Materials:
- You may desire more than one case, but I can't promise that drinking beer will speed up the building process. For instance, we almost destroyed our television when we dropped a side when hanging the joists.
- 3/4-inch (2 sheets) "$17.97 x 3/4 RTD SHTG Plywood = $35.94
- One more 1x8 sheet of plywood for the top ($4.01) came from the scrap heap.
- (12) 2'x4'x104-5/8 "Studs At $3.12 = $37.44
- (1) Box of 2 "Nails for Drywall Cost $6.47
- (1) Box of 1.25 "Wallboard screws cost $6.47 a box.
- (1) Box of 3 "Some screws for hanging drywall that were laying around from a previous job.
- Forty Pieces of Mounting Hardware for Climbing Holds (ideally you would have around 32 per sheet of plywood) The pricing and quality of the things I've purchased from him in the past have more than satisfied my needs, so I knew I'd be in good hands with my purchase here. http://rockymountainclimbinggear.com/id71.html - $40.00
- Nuts, or T's, in Excess (typically home walls have at-nut density of 2.25 per square foot) Only enough hardware to instal the holds was included, so if you want to play around with different setups, you'll need to pick up another hundred or so t-nuts.
- There are twelve plate connectors in this order, and their cost is seven dollars and twelve cents.
- Connectors, 90 Degree, 3, Set of 4 "Angle) @ $1.23 = $4.92
- To the tune of $6.00 for eight 2x4 joist hangers at $0.75 each
All Materials Add Up To $150.37
Tools:
- Drilling with an Electric Driver
- Shank-Head Phillips Bit
- 7/16 "Drill Bit for Boring Wood
- 3/8 "Socket Wrench
- Calculating Tape
- Protractor (or other angle making aid) (or other angle making aid)
- Saw (ideally a power saw, hand saws are only cool for around 10 minutes) (preferably a power saw, hand saws are only cool for about 10 minutes)
Don't Keep It Together
Begin by reducing the length of each piece of lumber to the appropriate width. Keep in mind that you'll need to trim it at precise angles so that your triangle's seams line up perfectly.
I planned for my wall to be 4 feet deep so that I could add more sides down the road by sawing a plywood sheet in half on the diagonal. I calculated that even with a 60-degree overhang, I would still have about a foot of vertical space on top, allowing me to securely instal a hang board, and I understood that the height couldn't exceed 8 feet (7 feet, 11 inches).
Six of the studs were cut to just a little longer than 8 feet to give me some wiggle space in case something went wrong, and I also knew that we would be utilising two 4' wide slabs of plywood for the wall's surface.
Put Together the Parts
To continue, construct the wall's side pieces. So that the joint wouldn't be stressed as much, I made sure the front and rear were flat on the floor. The usage of plate connectors is recommended at this point.
Bang the joints and connectors first.
-Third, fasten each plate with four 1.25-inch screws.
-Do the same on the other side of the joints, starting with step 1.
-Finally, you might want to use two more 3-inch screws to fasten the top joint.
If you want the wall's surface to continue around the sides, you may need to reinforce the interior of the triangles with cross-bracing. To cut costs, I opted to leave them exposed and without braces for the time being. After some time with it, I realised that the additional cross bracing wasn't needed.
In need of chairs for a baby's room? Stop right there. Here at My Baby Nursery, we provide a wide variety of options.
The Use of Horizontal Joists
To hang the joists on the rear of the wall squarely, you'll probably need one or two helpers. This is a crucial stage since it determines whether or not your wall will stand. We apologise for not taking any images of you guys actually hanging the joists, but there just weren't enough of you guys to help.
First, place the 2x4 in the desired location, and then, using two of the 3" screws, screw through the side and into the 2x4 horizontally to lock it in place.
After the stud is in position, the joist hangers are attached by driving 1.25-inch screws into the stud's face, followed by 3-inch screws into the 2x4. If you want to know more, look at the photographs.
Just screw the connector into the side of the 2x4 and into the top two joists, and you're all set. Two of the three-inch screws were used to screw through the side and into the joists at an angle.
Four horizontal joists were used for the overhang, and two joists were added on top to receive the plywood covering.
Preparing Bolt Holes
Drilling holes in the plywood for the holds to bolt into is a prerequisite to mounting it (this step is optional if you plan on utilising screw-on holds). You should also watch out for the joists getting in the way of your holes. I made a mistake and didn't double-check it, thus some of the holes are useless. Determine which side of the plywood will be the front, then drill from that side to the back, so that the plywood is attractive and does not splinter.
Staple the Plywood into place.
Plywood can be mounted on the wall once the holes have been bored and the joists have been hung on the back. A helping hand is appreciated at this stage as well.
First, reverse the plywood so that the bottom is flush with the floor joists.
The next step is to clamp the plywood down on the top joist with the help of a friend or a heavy duty clamping system.
Then, firmly press the plywood against the wall.
The final step is to use at least five of your two-inch screws to fasten each panel of plywood to the joists, after making sure that the plywood is flush against the joists.
Repetition for the second plywood sheet
The upper plywood strip should be hung in the same way.
As the photos attest, this was a memorable occasion for us.
Arrange T-Nuts and Holds
Put in your holds by driving t-nuts into the plywood's reverse side, then sliding the bolt through the nut and into the plywood.
As for you, put on your climbing shoes and get ready to chalk up; you've reached the top.
Tools Needed to Construct a Freestanding Rock Climbing Wall in Your Garden
To construct a climbing wall, you'll need posts of various sizes, such as 6" by 6" and 4" by 4" squares.
- Sheets of clay Plywood
- Cement
- For the Beginner:
- Sand
- The use of carriage bolts
- Priming and painting the outside
- Nuts, bolts, and T-nuts
- A variety of 2x4, 2x8, and 2x6 (these are the dimensions used in this blog, yours may be different).
Stakes
Plan everything out before you get in. Since you presumably only want to construct something once, it's in your best interest to give careful consideration to the design you ultimately choose on.
A Guide to Erecting the Posts and Other Primitive Stabilizers
Finding a suitable spot in your garden is essential. Choose a spot that is out of the way of your regular routine. Once you've located a suitable location, you can begin digging. Your posts determine how deep your structure can go.
Dig holes 4 feet deep for 6 by 6 posts and 3 feet deep for 4 by 4 posts. Drop an 8' 2" by 4" utilising a sawhorse as a fulcrum, as it may be difficult to insert a 6" by 6" post into the hole. Place the centre of the 2x4 over the sawhorse, and but the ends of the 6x6 posts against the 2x4.
To insert it into the hole, lift the other end so that the front glides down the 2" by 4"
Use the 2" by 4" pieces to nail into stakes and set up the posts vertically. To further strengthen the hole for the posts, pack some clay down into it. Larger posts can be made even more sturdy by being encased in concrete. Get the kids involved in the construction of your freestanding rock climbing wall to turn it into a family activity.
Once you have your support posts in place, you can begin framing.
Techniques of Framing
The remaining framing work is very simple after the initial setup of the three posts and the 2" by 8" cross braces for the main wall. Select an overhang to begin with (left one). Attach the 2" by 6" to the horizontally positioned 2" by 8" using the metal hangers.
They can be cut to size with a saw and given an angle cut of 30 degrees so that they line up with the front supports (2" by 4"). Cutting the notched end of the 2" by 4" so it fits securely on the 2" by 8" cross piece below can be challenging.
The front section should be placed such that all three supports are flush with the plywood beam. Tacking some 2" by 4 "s across the fronts of the three long-angled panels will help you out. Additional bracing can be easily installed after the 2" by 4" s have been installed.
After you've screwed everything together, go back and reinforce the major joints with carriage bolts. In the event that the frame was flimsy earlier due to the pliability of the extended vertical posts, the addition of the bolts should strengthen it. Moreover, the panels' contribution to the building's stiffness cannot be understated.
Finally, we may go on to the exterior panels.
Surface Panel Installation Method
Multiple options exist for the surface panels' treatment. You can achieve the desired texture by adding sand to standard exterior paint. Start by priming and painting both sides of all the plywood panels you'll need. The treatment is crucial for the panels' weather resistance.
As soon as the paint has dried, you can drill the holes for the T-nuts. T-nuts can be produced from zinc, stainless steel, or another material. Consider the long term when making your selection. To properly fasten your T-nuts and bolts, you'll need a spade bit drill.
On two-by-fours, lay out three pieces of painted plywood. Use the chalk to create a grid of 8-inch squares, and then make holes in each corner with the spade bit. Instead of drilling at the points where the grid meets, stagger each hole to create a variety of seemingly random forms.
Using a skill saw, cut the plywood sheets to size on the ground (these pieces will become the posts) and support them with 2" by 4"s. Following the removal of the studs, the plywood sheets should be painted along their cut edges before being screwed to the wall to ensure watertightness. The T-nuts can be pounded into the drilled holes that are spaced adequately from the sawed edges.
It's time to wrap things up once the exterior panels are done.
To Sum Up
You may now attach the panels to the wall by screwing the T-nuts you pounded onto the back of each. You are free to begin at the bottom and work your way to the top. Some T-nuts might coincide with your braces, in which case you can either relocate the braces or hold the plywood in place before hammering in the T-nuts.
You can either hang the plywood without removing the T-nuts or use the drill to bore holes in the T-nuts to accommodate the bolts.
Construct a House Railing
Creating Your Own Wall Design
Before building your own climbing wall, it's a good idea to check out as many indoor climbing facilities and personal walls as possible, especially if you're a novice. Take some rough measurements of the appealing walls you've identified. Knowing what works and what doesn't on other walls will help you immensely when creating your own.
Think About the Room You're In
Assess the available area for your wall and determine the best placement for it. Remember that there may be alternative uses for the available area. Is automobile parking space required if the structure is a garage? Is there room to put anything there too? Shelves can be built into the rear of a wall, or the wall can be angled to fit over and around a parked automobile. Access to electrical outlets and the back of the wall for future T-nut repairs should be preserved if the wall is to be built indoors. Light, air, and accessibility should all be taken into account at this time. Alternate means of illumination, ventilation, and access will be required if windows or doors must be blocked in order to construct the wall.
Keep in mind that chalk might get everywhere and falling can be noisy while deciding where to do your chalk talk. If it is inside, make sure to keep it as far away from the rest of your home as possible, especially if you live with people who don't like to climb. It's important to keep in mind that the holds on an outdoor wall won't survive as long as they would on an indoor wall, no matter how you try to protect them from the elements.
The selection of rocking chairs at My Baby Nursery is second to none.
Describe It
Using the measurements you took of your model, create a drawing. Then, using string and tacks or tape, indicate where each design piece will go in the finished space. To demarcate the upper limit of each wall, a plumb line should be hung from the ceiling. Don't forget to include in the width of the anchoring framework, the depth of the wall studs, and the depth of the plywood sheathing. Check to see if there are any mismatches. Make sure that there is plenty of room for any drops or swings, and that all doors, windows, lights, and outlets you'll need are easily accessible. Check back with the original queries to ensure consistent responses: Are there going to be enough windows and light? Will the presence of chalk dust be a problem in your home? Is there anything more that could be done with the land? Can you fit the car into the garage now? Will the shelves in your room be functional?
Ensure you have adequate space to unpack the components, assemble the parts, and then stand them up. It's a good idea to give yourself twice as much room to build the wall as you think you'll need. The amount of overhang and the height are both factors here. Before putting the wall up, make sure there is enough room for it to stand upright without hitting the ceiling.
Stocktaking Report
Multiplying the price per sheet by the number of full sheets of plywood used in your design will give you a ballpark figure for the cost of your wall's construction materials (without including holds or paint). A sheet of 3/4" ACX plywood, for instance, may set you back $42. Two times four is forty-two, therefore if your design calls for four sheets, your estimate is $336. If you haven't completely busted the bank, it's time to make a detailed materials list using your dimensional drawing.
Before making a list, think about the sizes and types of materials you'll need, as well as how they'll all fit together. The sheeting should be made out of 3/4" ACX plywood. You can trust that this plywood will withstand the elements. Lower quality plywood has larger voids in the inner layers, making it easy to rip T-nuts right through the sheeting while climbing. There is no suitable material weaker than 3/4" thick, and all U.S. hold manufacturers use that thickness as their standard when designing bolt and T-nut lengths.
Behind each wall, at the top and bottom, and every 16 inches in between, studs will be used to create the framework. Nine studs are needed for a wall that is eight feet wide (seven vertical studs spaced 16 inches apart as well as a top plate and bottom plate). When the vertical studs are placed 24 inches apart instead of 16 inches, more T-nuts can be utilised; however, wider studs are required and the plywood sheeting is more likely to bend.
Narrower and weaker studs (like 2x4) can be used to frame shorter, vertical walls, but broader, stronger framing materials are required for walls that will be extending outward. The span and the weight it must support dictate the size of the framing materials needed. Use 26 or 28 studs for walls that overhang by a few inches, and 28 or 210 studs for walls that are more than 8 feet tall. Select the studs with the fewest knots and the most straight lengths when building a frame.
Use self-drilling decking screws to put up your wall because they're more secure and simpler to take apart if you make a mistake. Anchor header joists or plates to the support structure using #14 x 3-1/2′′ (or 4-1/2′′ if screwing through drywall) screws, link framing components using #12 x 3′′ screws, and attach plywood to the framework using #8 x 2′′ screws.
Don't use harder screws or drywall screws; they're too fragile for this task. Two pounds of 16d nails are also recommended for use in temporary attaching framing members and for reaching places that a screw gun can't reach. It's possible that you'll require a wide range of different supplies, depending on the specifics of your support structure and layout. Several suggestions are provided below.
Materials:
- Sheets of 3/4" ACX plywood, 4' x 8'
- 2x4s, 2x6s, 2x8s, 2x10s are the standard sizes for wood studs in a frame.
- #14 x 3-1/2′′ (or 4-1/2′′), #12 x 3′′, and #8 x 2′′ are all standard sizes for self-drilling decking screws.
- Sinker nails, 16d vinyl-coated
- T-Nuts, steel, 3/8 inch, 4-prong
- Expanding anchors for concrete
- Hangers for joists
- Using frames to connect components
Tools:
- Quantity tape
- Level, 4′
- Compounding or squaring off
- Separation Line, Made of Chalk
- T-bevel
- Pencils
- Device for locating studs
- A hammer with claws
- Wood chisel
- Pruning saw
- Miter saw
- The use of a drill with power tools
- Bits, such as 1/2-inch spades and Forstner drills
- Cordless drill or screw gun
- Bits for #2 Phillips-head or square-drive screwdrivers (Buy several of these, they wear out quickly!)
- Jigsaw
- Cord extenders
- A pry bar
- Gloves
- Eye protection
- Step ladder and/or extension ladder
- Sawhorses
- C-clamps, bar clamps, and other sizes ranging from 6 to 12 inches
- Tools needed: 5/16-inch and 7/32-inch hex wrenches
Placing Bricks for the Wall
While we'll be describing the building process for a typical case, the principles discussed here can be applied to any arrangement of a bouldering wall in your own home.
Framework
Every every wall must be framed separately. It's easier to tackle the frame one piece at a time if you construct it in stages. If you're going to attack a wall, it's best to do it in a certain order: highest or most important wall first, then least important. Thanks to this, modifications to the space can be made with minimal disruption. Extra frame pieces are joined to the main wall structure to make up the secondary walls.
Remember that a stud is not the same thing as a joist if you aren't familiar with framing terminology. For our purposes, they are interchangeable because they both achieve the same result. Stump spacing along a wall's height and joist spacing across a room's width must conform to building codes. The term "wall" is often used in favour of more specific adjectives like "vertical" or "horizontal" because few bouldering walls are either of those. These structural components are sometimes called "stringers" for short.
It is possible to frame walls on the ground and raise them into place in one smooth action, just like building a house, so long as the overhang is not too steep. It's not complete until the top and bottom plates, as well as the two exterior studs, are set in place. Verify the squareness of the frame by taking diagonal measurements from opposite corners and comparing their lengths. Remove any stragglers from the frame's diagonals, and then screw the four corners together.
Make a mark on the top and bottom plates every 16 inches to indicate the placement of the inner studs. When determining the size of the frame, be consistent and take all of your measurements from the same side. You can calculate the distance between the remaining studs by first measuring the gap between the furthest and nearest studs. If the width of the wall is greater than the width of the plywood sheet, then the end of the plywood should be nailed into the middle of a stud. This will happen mechanically if you use precise measuring techniques and put 16 inches or 24 inches between your posts.
Whether you're building a wall or a ceiling, the studs and joists should have their ends cut at right angles to the length of the material. For an overhanging wall, however, the studs must be cut at an angle so that the top and bottom plates are flat with the floor (or the wall) and the ceiling. Use a T-bevel to mark the appropriate angle, and then cut off one stud at that point. Make sure it fits, and then use it as a guide to cut the rest of the studs to size. Since the stud's end was cut at an angle, it will now be physically larger than the plate on which it is mounted. Align the front (or climbing side) of the stud with the front of the plate, and then make a second cut on the back of the stud to make it flush with the plate if the wall is level.
Because of this, you'll need to carefully scrutinise each stud to determine its curvature. In order to assemble the frame, make sure the top is flush on the back wall. If you're building a wall, use a framing square to ensure that your studs are plumb with the ceiling and floor plates. Check that the outside structure is level again, and then put it back together with screws.
The wall is built on the ground as described above, then lifted into place, checked for squareness, and finally fixed with two #14 screws driven the length of each ceiling joist and floor joist. Having an accessible framework will make the process run more smoothly. All interior walls and ceilings must be coated with wallboard to comply with fire rules; therefore, a stud finder will be needed to identify the underlying framing. In a typical house, the distance in inches between the centres of two adjacent wall studs is 16 inches, whereas the distance in inches between the centres of two adjacent floor or ceiling joists is 24 inches. Once you've located one stud or joist in a room, finding the rest is a breeze.
You can't tell if your screw went in securely since drywall is opaque. Verify that a good deal of force is being applied to the screwdriver and that the screws are meeting resistance at each stage of their insertion. Floor, wall, and ceiling plates can be secured with the use of concrete expansion anchors.
The sleepers must be put perpendicular to the wall if the wall is at an angle to the joists, and 24 inches on centre, with each sleeper picking up three joists. The next step is to attach the wall's top plate (also known as the header joist) to the sleepers.
Overhanging walls transfer their loads to the supporting structure differently than nearly vertical walls. They're more analogous to flooring than walls in a house. Assemble the header joists (top and bottom plates) to the ceiling joists and wall studs before building the wall. Using the top and bottom plate approach, secure each header joist with at least two #14 screws throughout its length.
Header joists must be level and square to each other for the installation of wall structure and plywood sheeting. Avoid putting your faith in the current arrangement, as it is exceedingly improbable that the walls, floors, and ceilings are square or level. It is important to use a level and tape measure to verify that the header joists are at the correct height.
Finally, instal joists (studs' equivalent) at 16-inch intervals between the headers, with the crown of each joist pointing upward (or back). Hangers for joists are used to join them together. Therefore, in order for the joists to rest flush against the hanger, a small, flat piece must be removed from the end of each joist.
Plywood that is very thin
T-nuts must be installed prior to nailing plywood to the framework. Stagger three to six panels on saw horses and clamp them together. Each ACX plywood sheet has a "A" side and a "C" side, with the "A" side being of higher quality and free from faults. The "A" side is up now. When the panels are installed, they will be facing the outside and acting as the climbing surface.
Mark the locations of the joists when installing the panel (each end and every 16 inches). Although panels are normally installed horizontally on the framework, if you find that installing them vertically will better complement the design of your walls, you should make a note of this now and mark the joist locations accordingly. It can be arranged in a grid, or holes can be drilled at random. On the other hand, you must not make holes in the joists. More T-nuts per sheet are better, but 100–250 is ideal. You can get away with using fewer T-nuts and more screw-on holds on the bottom sheets of a wall because the footholds will be doing most of the supporting.
Use a 1/2-inch Forstner or spade bit to create holes for the T-nuts. The holes must be drilled straight. Use a low-priced drill press attachment on your hand drill to ensure perfectly straight holes every time.
If there are design restrictions that prevent panels from fitting in full 4' x 8' sheets, they should be cut down to size right now. After the panels have been cut to size, make sure they fit properly before tightening the T-nuts.
Panels can be flipped over to get rid of drilled-in splinters. The "C" side is where you're supposed to screw in your T-nuts (the opposite side that you drilled from). The holes need to have T-nuts hammered into them. The T-nuts must be aligned correctly. Putting in more work at the outset will save time and energy later on.
Now that the panels have been measured, and the T-nuts have been secured, they may be joined to the framework. The addition of a couple jug holds makes it simple to relocate panels. It is recommended to use #8 x 2′′ self-drive screws to secure the panels, leaving a 6-inch space around the outside and in-between each joist or stud. In other words, the screws should be driven no more than three-quarters of an inch from the panel's edge, with the exception of joining places, where the screw should be driven 3/8 of an inch in. The 2"x4" blocking between the joists should be placed exactly where the panels meet to ensure a strong connection and a waterproof joint.
Painting
Plywood walls can be left unpainted inside, but should be painted before being exposed to moisture. To paint the exterior, you can use any kind of paint you like. Sealing off the T-nuts with golf tees will stop paint from seeping into the threads.
Declining Region
Check the area under and surrounding your wall to make sure it's stable and won't give way if someone were to fall. Inspect the area to make sure there are no trip hazards that could injure you in the event of a tumble. Try to avoid using your bouldering talents on bare surfaces like concrete, asphalt, wood, etc. A direct hit to an unprotected surface might cause serious head injuries or even death. Older, weathered grass and turf have less of the shock-absorbing characteristics that make it so useful. Safety zones should be sufficiently large to protect you from dynos and swinging falls. When working with a high wall, it's important to leave a safety zone that extends several yards beyond the wall's edge.
Bouldering cushions, old mattresses, or a few layers of carpet padding are just a few of the options for padding your fall zone. No matter what methods you employ, you must take seriously your responsibilities to maintain a safe fall zone. Spinny or broken artificial climbing grips are a common cause of deadly free-falls. Do not stand in a place where a fall could cause serious injury to you or anybody else.
The Wall's Stability
The choice of climbing grips is the single most important element of a good home bouldering wall. Because they are likely to be the most expensive part of your wall, you'll want to get the most out of your investment in holds. When outfitting a new wall, having a sufficient number of grips of various types is essential. Get as much variety as you can for your holdings budget right now; other considerations will become more crucial later on. Metolius offers a wide selection of sizes and forms for their grip sets. These bundles are the most cost-effective option for erecting a new wall. Check the amount and number of holds you're getting before settling on a storage option. It's possible that one manufacturer's 50-hold set has the same price as another's 40-hold set, but the former may consist completely of smaller holds. Only consider holds of similar dimensions when doing price comparisons.
Aim for 15-20 holds each sheet if you're just starting out, but the more holds you have, the more interesting and engaging your wall will be. Plywood used for home walls often has more than one hundred holds per sheet.
Prioritize having a wide selection of holds over worrying about their exact shapes right now. You should use bolt-on grips of varied sizes and shapes for roughly 60% of your rack (edges, pockets, pinches, slopers, etc.). It's recommended that 20% of your choices be anchors. These may be attached by tiny bolts or screws. Plywood walls benefit greatly from screw-on mounting. Climbing on plastic becomes more technical and realistic, and they are a great value because they can be made thinner than bolt-on grips and so fit in places where bolt-on grips won't, such as in front of frame members or in corners. Compared to bolt-ons, the main disadvantage of screw-ons is that they are not as robust.
Smaller footholds, maybe 10% total, should be sprinkled throughout your selection. They'll be very similar to the footholds, but larger and more encouraging overall. Similarly, take advantage of the adaptability and practicality that screw-ons offer. Most of the little grips you select may be used for either your hands or your feet, so there's no need to worry too much about the differential between hand and foot holds. Make sure you have a variety of small containers and that they account for about 30 percent of your total stock. Depending on your skill level and the angle of the wall, jug holds should make up 10–20% of your overall choice. Metolius has convenient access to little jugs for purchase. For wall display, these are more cost-effective than regular-sized jugs while also taking up less vertical space in the area. Get a variety of shapes, including corner holds, low-profile plates and rails, huge slopers, etc., for the final pitch.
Installation
Socket head cap screws measuring 3/8" are typically used to attach commercially available climbing grips. The three most common types of heads are all variations on the same theme. Bolt holes in handgrips come in a wide variety of shapes and sizes, and each design is compatible with at least one of those. The correct bolt style must be used. The standard socket head is by far the most common design. This is the most powerful option, but also the most publicised. The bolts here call for a hex wrench with a 5/16′′ square opening. Low-profile grips benefit most from bolts with a flat head or a button head.
Since flathead screws have a flat top and sides, the hold benefits from tapered countersinks. Thin, non-countersunk grips are ideal for using button head bolts. A conventional socket head bolt can be used in place of a button head bolt, but it will stick out further and may be in the way. A 7/32′′ hex wrench is used for flathead and button head screws. Holds that need a flat head should never be used with a socket or button head. Their hold will loosen, and perhaps even be broken, as a result.
The length of the bolt must be adjusted to accommodate the grip size. Use bolts of the proper length for your own safety. The bolt needs to extend through the back of the hold by at least 3/4" for the T-nut threads to completely engage the plywood wall. As long as there is enough room behind the wall to fully tighten the bolt, you may use a longer bolt. After the head, on a longer bolt, you'll find the shoulder or unthreaded part. The hold won't work if the shoulder is allowed to go past the back of the grip.
Since the right bolt is often included with the hold by the manufacturer, there is no excuse for using the wrong hardware.
Wall anchors that screw on are ideal for usage in the home. The screws that help fasten the grips to wooden surfaces are self-driving and may be found on the back of the grips. As a result of their thin construction, many screw-on grips are readily damaged. Thin screw-ons should be attached just once and not moved. Due to their low profile, they rarely conflict with other grips, thus installing them permanently isn't a huge hassle. When mounting screw-ons using a power drill or screw gun, you should utilise the smallest clutch setting available. Be careful not to overtighten the screws or to drill them in. As a result, you won't have to break quite as many holds if you complete tightening by hand. It's a good idea to use construction adhesive or epoxy in addition to the screws. The durability of microscopic screw-on grips will be greatly enhanced as a result.
All restraints must be lifted at this time. A good set of T-handled hex wrenches will come in handy for this job. You should put most of the footholds on the floor panels of your wall. To avoid future complications when adding bolt-on footholds, place screw-on footholds far enough away from existing T-nut holes. Create as many openings as possible for your feet in the lower panels, but save a couple for the first jugs. Problems on home bouldering walls frequently begin in a sit position, so be sure to include some low-hanging jugs. To prevent jugs from turning into massive footholds as you climb the wall, it is best to start them out with a bunch of underclings and side-pulls. It's also a good idea to mount a couple finishing jugs on your wall's highest ledge.
You can also hang some finishing jugs up high on the wall. Since you won't need to grab onto anything to climb the top panel(s), or two, use the remaining footholds on the lower side of the wall. Next, you should use the rest of the grips to fill in the rest of the wall. If your wall is angled at different degrees, the larger and more positive holds should be on the steeper sections, and vice versa. However, you should still try to mix it up and keep the variance as high as possible. Always keep in mind that every given hold can be utilised in a wide range of contexts, from underclings to sidepulls and everything in between.
Ambience of a Training
Boulder problems can be made by just selecting a few grips at random and pulling between them, but the more thought and planning that goes into making them, the more enjoyable they will be. Experiment with as many different manoeuvres as possible; don't be afraid to go horizontal if you're having trouble moving forwards. Don't get stuck in a rut of only pulling down on pockets; instead, consider all of the holds available to you as potential side-pulls or underclings. Try not to use really big footholds. They are useless for practising your abilities or toning your abs. Determine whether problems are "open" (any hold on the wall can be used as a footing), "tracking" (only the defined handholds on the problem can be used as footholds), "screw-ons only," or specify particular footholds for each move to practise your footwork.
When you've established a particularly challenging issue, mark it with coloured tape and write down the details in a book, including the holds at the top and bottom, the number of moves required, the colour of the tape, any restrictions on footwork, and so on.
Maintenance
Maintenance on your bouldering wall primarily consists of checking and adjusting the holds. Even the smallest flaws in a hold necessitate immediate removal. When your wall is new, after drastic temperature shifts, or in a humid environment, holds can release with startling rapidity and frequency. Potentially harmful falls can come from spinning or losing grip, thus it's important to check
Repeatedly cinch them down.
Occasionally T-nuts will become cross-threaded or stripped in the plywood, or they may just spin in the wood. To remove or tighten a bolt that has been stuck because of a T-nut that has spun or is severely cross-threaded, insert a pry bar under the edge of the grip and pry outwards. Then you should attempt to untighten the bolt. If it doesn't work, the bolt will have to be cut by sliding a hacksaw blade between the hold and the wall. If a T-nut breaks, you can replace it by tapping it out of the wall from the front, threading it onto a bolt that is already through a hold (choose a strong, thick one), and tightening the bolt to draw the T-nut into position. Don't attempt to patch a significantly damaged plywood panel with the hole. If the broken T-nut is small enough, you can glue it back together or use an anchor to hold it in place from behind.
By securing it with short wood screws, we prevent it from turning.
Check the wall's fasteners on a regular basis to make sure nothing is loose, worn out, or broken. If you want to know if your wall needs to be strengthened or fixed, look for stress indications like bulging seams or joints.
You'll want to train like a circus monkey once your wall is finished and you're overcome with the need to burn off your climbing partners with your newfound strength. A word of caution: Overuse injuries may arise from using a home bouldering wall too frequently because to its many attractive features. You should always take the time to warm up before a workout, and you should get enough of relaxation in between sessions. In order to prevent overuse injuries, it's important to work both your agonist and antagonist muscles. (These are the muscles that work in opposition to the extensor muscles used for climbing, such as the triceps, pectorals, finger extensors, etc.) Use a Metolius GripSaver Plus to strengthen your hand, wrist, and forearm muscles while you work on your upper body with push-ups and dips. Observe my advice, and you'll have a fantastic climbing season.
Check out our range of baby nursery change table furniture to complete your baby nursery.
Conclusion
It may be more practical and economical to instal your own climbing wall at home or in your backyard. Brita Bookser and Adam Griggs can help you out with it. Crawl/Stand/Walk is a design studio founded by two climbers who saw a need for innovative climbing structures. "All Materials Add Up To $150.37" includes plywood, nuts, screws, nails, and other hardware. The cost per sheet of plywood for the base is $17.97, plus add-ons such as 2x4 joist hangers and a power saw.
Horizontal joists were used for the overhang, and two joists added on top to receive the plywood covering. If you want the surface to continue around the sides, you may need to reinforce the interior with cross-bracing. Plywood can be mounted on the wall once the holes have been bored and the joists have been hung on the back. To construct a climbing wall, you'll need posts of various sizes, such as 6" by 6" and 4" by 4" squares. Dig holes 4 feet deep for 6 by 6 posts and 3 feet for 4 by 4 posts.
Larger posts can be made even more sturdy by being encased in concrete. Framing is very simple after the initial setup of the three posts and the 2" by 8" cross braces. Cut plywood panels to size and support them with 2" by 4"s. Drill holes for T-nuts and use a spade bit drill to fasten them. Add sand to standard exterior paint for surface panel treatment.
Knowing what works and what doesn't on other walls will help you immensely when creating your own. Light, air, and accessibility should all be taken into account at this time. If it is inside, make sure to keep it as far away from the rest of your home as possible. Make sure that there is plenty of room for any drops or swings, and that all doors, windows, lights, and outlets are easily accessible. A sheet of 3/4 ACX plywood, for instance, may set you back $42.
Plywood sheeting should be made out of 3/4 ACX plywood. Select the studs with the fewest knots and the most straight lengths. Anchor header joists or plates to the support structure using #14 x 3-1/2′′. The process can be applied to any bouldering wall in your own home. It is possible to frame walls on the ground and raise them into place, so long as the overhang is not too steep.
For an overhanging wall, the studs must be cut at an angle so that the top and bottom plates are flat with the floor (or the wall) and ceiling. Overhanging walls transfer their loads to the supporting structure differently than nearly vertical walls. They're more analogous to flooring than walls in a house. Assemble the header joists (top and bottom plates) to the ceiling joists and wall studs before building the wall. header joists must be level and square to each other for the installation of wall structure and plywood sheeting.
T-nuts must be installed prior to nailing plywood to the framework. If panels can't be cut to size, they should be cut down to size right now. Panels can be flipped over to get rid of drilled-in splinters. It is recommended to use #8 x 2′′ self-drive screws to secure the panels. Sealing off the T-nuts with golf tees will stop paint from seeping into the threads.
Bouldering cushions, old mattresses, or a few layers of carpet padding are just a few of the options for padding your fall zone. Get as much variety as you can for your holdings budget right now. The more holds you have, the more interesting and engaging your wall will be. Make sure you have a variety of small containers and that account for about 30 percent of your total stock. Take advantage of the adaptability and practicality that screw-ons offer.
Bolt holes in handgrips come in a wide variety of shapes and sizes, and each design is compatible with at least one of those. The length of the bolt must be adjusted to accommodate the grip size. Use bolts of the proper length for your own safety. Thin screw-ons should be attached just once and not moved. Due to their thin construction, many screw-on grips are readily damaged.
Content Summary
- Though you can pay to use the walls at many modern gyms, it may be more practical and economical to instal your own climbing wall at home or in your backyard.
- You can simply get a fantastic workout in the comfort of your own home by coming up with a good plan and building the wall.
- The children of a San Francisco home built by Regan Baker have complete reign over the basement, which has a craft room, comfortable, kid-sized sofas, and, most impressively, a rope and rock-climbing wall.
- It's crucial that you choose the best breastfeeding chair for your baby's room.
- http://rockymountainclimbinggear.com/id71.html - $40.00 Nuts, or T's, in Excess (typically home walls have at-nut density of 2.25 per square foot) Only enough hardware to instal the holds was included, so if you want to play around with different setups, you'll need to pick up another hundred or so t-nuts.
- There are twelve plate connectors in this order, and their cost is seven dollars and twelve cents.
- Put Together the PartsTo continue, construct the wall's side pieces.
- If you want the wall's surface to continue around the sides, you may need to reinforce the interior of the triangles with cross-bracing.
- The Use of Horizontal JoistsTo hang the joists on the rear of the wall squarely, you'll probably need one or two helpers.
- Drilling holes in the plywood for the holds to bolt into is a prerequisite to mounting it (this step is optional if you plan on utilising screw-on holds).
- Staple the Plywood into place.
- Plywood can be mounted on the wall once the holes have been bored and the joists have been hung on the back.
- Finding a suitable spot in your garden is essential.
- Dig holes 4 feet deep for 6 by 6 posts and 3 feet deep for 4 by 4 posts.
- Once you have your support posts in place, you can begin framing.
- Techniques of FramingThe remaining framing work is very simple after the initial setup of the three posts and the 2" by 8" cross braces for the main wall.
- Start by priming and painting both sides of all the plywood panels you'll need.
- To properly fasten your T-nuts and bolts, you'll need a spade bit drill.
- To Sum UpYou may now attach the panels to the wall by screwing the T-nuts you pounded onto the back of each.
- Before building your own climbing wall, it's a good idea to check out as many indoor climbing facilities and personal walls as possible, especially if you're a novice.
- Think About the Room You're InAssess the available area for your wall and determine the best placement for it.
- Using the measurements you took of your model, create a drawing.
- Don't forget to include in the width of the anchoring framework, the depth of the wall studs, and the depth of the plywood sheathing.
- Stocktaking ReportMultiplying the price per sheet by the number of full sheets of plywood used in your design will give you a ballpark figure for the cost of your wall's construction materials (without including holds or paint).
- The span and the weight it must support dictate the size of the framing materials needed.
- Extra frame pieces are joined to the main wall structure to make up the secondary walls.
- Make a mark on the top and bottom plates every 16 inches to indicate the placement of the inner studs.
- For an overhanging wall, however, the studs must be cut at an angle so that the top and bottom plates are flat with the floor (or the wall) and the ceiling.
- Make sure it fits, and then use it as a guide to cut the rest of the studs to size.
- In order to assemble the frame, make sure the top is flush on the back wall.
- The next step is to attach the wall's top plate (also known as the header joist) to the sleepers.
- Assemble the header joists (top and bottom plates) to the ceiling joists and wall studs before building the wall.
- Header joists must be level and square to each other for the installation of wall structure and plywood sheeting.
- It is important to use a level and tape measure to verify that the header joists are at the correct height.
- Mark the locations of the joists when installing the panel (each end and every 16 inches).
- Use a 1/2-inch Forstner or spade bit to create holes for the T-nuts.
- Now that the panels have been measured, and the T-nuts have been secured, they may be joined to the framework.
- The Wall's StabilityThe choice of climbing grips is the single most important element of a good home bouldering wall.
- When outfitting a new wall, having a sufficient number of grips of various types is essential.
- Make sure you have a variety of small containers and that they account for about 30 percent of your total stock.
- for the final pitch.
- The length of the bolt must be adjusted to accommodate the grip size.
- Use bolts of the proper length for your own safety.
- As a result of their thin construction, many screw-on grips are readily damaged.